So, you’ve decided to dive into the world of electrical wiring and testing. That’s awesome! Testing electrical wires might sound intimidating, but don’t sweat it—it’s easier than you think. Whether you’re a DIY enthusiast or just someone trying to troubleshoot a wiring issue at home, knowing how to test electrical wires is a game-changer. Stick with me, and I’ll walk you through everything you need to know.
Let’s face it, electricity can be tricky. But here’s the deal: understanding how to test electrical wires properly is not only important for safety but also for saving you time and money. Imagine this—you’re working on a project, and suddenly, something goes wrong. Instead of calling an expensive electrician, you can grab your trusty multimeter and figure out what’s up in no time.
Before we dive deep, let me set the stage. This guide is designed for beginners who want to learn the ins and outs of testing electrical wires. We’ll cover everything from the tools you’ll need to step-by-step instructions, safety tips, and common mistakes to avoid. By the end of this, you’ll feel like a pro. Trust me, you’ve got this!
Table of Contents
- Essential Tools for Testing Electrical Wires
- Safety First: Preparing for Electrical Testing
- Using a Multimeter to Test Electrical Wires
- Testing for Continuity in Electrical Wires
- How to Test Voltage in Electrical Wires
- Measuring Resistance in Electrical Wires
- Common Issues When Testing Electrical Wires
- Mistakes to Avoid When Testing Electrical Wires
- Pro Tips for Testing Electrical Wires
- Wrapping It Up: Final Thoughts
Essential Tools for Testing Electrical Wires
Alright, let’s talk about the tools of the trade. Testing electrical wires isn’t rocket science, but having the right gear makes all the difference. Here’s what you’ll need:
What You’ll Need:
- Multimeter: This is your best friend. A multimeter measures voltage, current, and resistance, making it indispensable for testing wires.
- Non-Contact Voltage Tester: This handy little gadget lets you detect live wires without touching them. Super safe and super useful.
- Insulated Screwdrivers: Always go for insulated tools to avoid accidental shocks.
- Wire Strippers: You’ll need these to expose the inner wires without damaging them.
- Gloves and Goggles: Safety gear is a must. Protect those hands and eyes!
Now that you’ve got your toolkit ready, let’s move on to the next step: safety. Because, hey, safety first, right?
Safety First: Preparing for Electrical Testing
Here’s the deal—working with electricity can be dangerous if you’re not careful. But don’t panic! With a few precautions, you can stay safe while testing electrical wires. Follow these tips:
Safety Precautions:
- Turn Off Power: Always switch off the main power supply before working on any wiring. Double-check with a non-contact voltage tester to ensure the circuit is dead.
- Use Protective Gear: Gloves, goggles, and insulated tools are your lifelines. Don’t skip them.
- Stay Grounded: Use a grounded outlet or work on a dry surface to prevent accidental shocks.
- Work with a Partner: If possible, have someone around to help in case of emergencies.
Once you’ve got your safety ducks in a row, let’s get to the fun part: using a multimeter to test electrical wires.
Using a Multimeter to Test Electrical Wires
A multimeter is your go-to tool for testing electrical wires. It’s like a Swiss Army knife for electricians. Here’s how to use it:
Step-by-Step Guide:
- Set the Multimeter: Choose the appropriate setting for what you’re measuring—voltage, resistance, or continuity.
- Connect the Probes: Attach the red probe to the positive terminal and the black probe to the negative terminal.
- Test the Wire: Touch the probes to the wire terminals and check the readings on the multimeter display.
Simple, right? But wait, there’s more. Let’s talk about continuity testing.
Testing for Continuity in Electrical Wires
Continuity testing checks whether a circuit is complete and uninterrupted. It’s crucial for ensuring that your wires are functioning properly. Here’s how it works:
With your multimeter set to the continuity mode, touch the probes to both ends of the wire. If the circuit is good, you’ll hear a beep or see a reading indicating continuity. If there’s no beep, it means there’s a break in the circuit. Easy peasy!
How to Test Voltage in Electrical Wires
Voltage testing is essential for diagnosing electrical issues. Here’s a quick rundown:
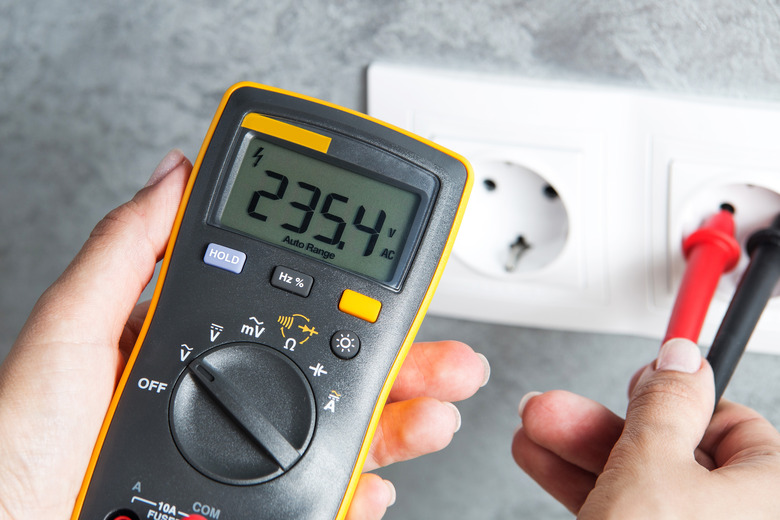
Set your multimeter to the voltage setting and touch the probes to the wire terminals. The display will show the voltage reading. If the voltage is too high or too low, it could indicate a problem with the wiring or the power source.
Tips for Voltage Testing:
- Make sure the power is on when testing voltage.
- Double-check your multimeter settings to ensure accurate readings.
- Keep your fingers away from the probe tips to avoid electric shock.
Now let’s shift gears and talk about resistance.
Measuring Resistance in Electrical Wires
Resistance testing helps identify problems in wiring, such as damaged or corroded connections. Here’s how to do it:
Turn off the power supply, set your multimeter to the resistance mode, and touch the probes to the wire terminals. The reading will tell you the resistance value. A high resistance indicates a potential issue.
Common Resistance Issues:
- Corrosion: Rust or corrosion can increase resistance, leading to poor connections.
- Loose Connections: Ensure all connections are tight and secure.
- Broken Wires: Damaged wires can cause high resistance and should be replaced.
Resistance testing might sound technical, but with practice, it becomes second nature. Let’s move on to common issues you might encounter.
Common Issues When Testing Electrical Wires
Even with the best tools and techniques, things can go wrong. Here are some common issues you might face:
Issue #1: Inaccurate Readings
This often happens when the multimeter isn’t properly calibrated or the probes are dirty. Clean the probes and recalibrate your multimeter to ensure accurate readings.
Issue #2: No Continuity
If your continuity test fails, it could mean a broken wire or loose connection. Inspect the wiring carefully and repair any issues.
Issue #3: High Resistance
High resistance can be caused by corrosion, loose connections, or damaged wires. Address these problems promptly to prevent further issues.
Now that you know what to look out for, let’s talk about mistakes to avoid.
Mistakes to Avoid When Testing Electrical Wires
Here are some rookie mistakes that can get you into trouble:
- Skipping Safety Precautions: Always turn off the power and use protective gear.
- Using Faulty Tools: Make sure your multimeter and probes are in good condition.
- Ignoring Warning Signs: If something feels off, stop and investigate before proceeding.
Avoiding these mistakes will keep you safe and ensure accurate results. Let’s wrap up with some pro tips.
Pro Tips for Testing Electrical Wires
Here are a few expert tips to help you master the art of testing electrical wires:
- Practice Makes Perfect: The more you practice, the better you’ll get. Start with simple projects and work your way up.
- Document Your Work: Keep notes on your findings and any repairs you make. This will help you track progress and identify recurring issues.
- Stay Updated: Electricity is constantly evolving. Stay informed about the latest tools and techniques to improve your skills.
And there you have it—a comprehensive guide to testing electrical wires for beginners. Let’s recap what we’ve learned.
Wrapping It Up: Final Thoughts
In this guide, we’ve covered everything from the essential tools to safety precautions, step-by-step instructions, and common issues to avoid. Testing electrical wires might seem daunting at first, but with the right knowledge and tools, it’s totally doable.
Remember, safety is key. Always prioritize your safety and the safety of others when working with electricity. If you’re ever unsure, don’t hesitate to call a professional.
Now it’s your turn. Grab your multimeter, put on those gloves, and start testing those wires. And don’t forget to share your experiences in the comments below. Happy testing, and stay safe!