Alright, listen up, folks. Testing electrical wires isn’t just some random task—it’s a crucial skill that every beginner should master. Whether you're fixing a broken outlet, installing new lighting, or simply troubleshooting an issue, knowing how to test electrical wires safely and accurately is a game-changer. But here’s the deal: not everyone knows where to start. That’s why we’ve created this ultimate guide to help you navigate the world of electrical testing like a pro.
Now, I get it—working with electricity can be intimidating. You’ve probably heard horror stories about sparks flying or worse, someone getting hurt. But don’t panic just yet. With the right tools, techniques, and a little know-how, you can test electrical wires confidently and safely. So, buckle up because we’re diving deep into the ins and outs of electrical testing.
This guide isn’t just some generic list of tips; it’s a step-by-step journey designed to empower you with the knowledge and confidence to tackle any electrical testing project. From understanding the basics to advanced troubleshooting, we’ve got you covered. Let’s get started!
Why Testing Electrical Wires Matters
Here’s the thing—when it comes to electrical work, ignorance isn’t bliss. Ignoring faulty wires or improper connections can lead to serious problems, like short circuits, power outages, or even fires. That’s why testing electrical wires is so important. It’s not just about safety; it’s about preventing disasters before they happen.
But how often should you test your wires? Well, that depends on several factors, like the age of your wiring, the frequency of use, and any signs of wear and tear. If you notice flickering lights, buzzing sounds, or outlets that stop working, it’s probably time to check those wires.
Let’s face it—electrical issues don’t fix themselves. By learning how to test electrical wires, you’re taking a proactive step toward ensuring the safety and reliability of your home’s electrical system. And hey, who doesn’t love a little peace of mind?
Tools You’ll Need to Test Electrical Wires
Before we dive into the actual testing process, let’s talk about the tools you’ll need. Think of these as your trusty sidekicks in the world of electrical testing. Here’s a quick rundown:
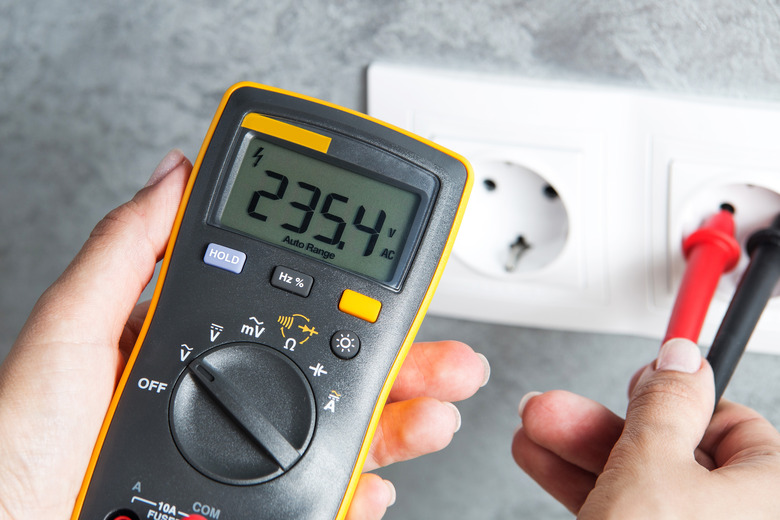
- Multimeter: This is your go-to tool for measuring voltage, current, and resistance. It’s like a Swiss Army knife for electrical testing.
- Voltage Tester: A simple yet effective tool for checking if a circuit is live. Think of it as your safety net.
- Continuity Tester: Used to verify if there’s a complete path for electricity to flow. It’s like a detective for broken circuits.
- Insulated Gloves: Safety first, folks. These gloves protect you from accidental shocks.
- Wire Strippers: For stripping the insulation off wires without damaging the conductor. Precision is key here.
Having the right tools makes all the difference. Trust me, you don’t want to be fumbling around with a cheap screwdriver when you could have a high-quality multimeter doing the heavy lifting.
Understanding the Basics of Electrical Testing
Alright, let’s break it down. Electrical testing might sound complicated, but it’s actually pretty straightforward once you understand the basics. Here’s what you need to know:
What Is Voltage?
Voltage is like the pressure that pushes electricity through a circuit. Think of it as the fuel that powers your devices. Too much voltage, and you risk damaging your appliances. Too little, and your gadgets won’t work properly. That’s why testing voltage is crucial.
What Is Current?
Current is the flow of electricity through a circuit. It’s like the traffic on a highway. If the flow is too high, you could end up with a bottleneck—or worse, a meltdown. Testing current helps you ensure everything is running smoothly.
What Is Resistance?
Resistance is anything that opposes the flow of electricity. It’s like friction in a circuit. High resistance can cause overheating and damage to your wires. That’s why measuring resistance is an essential part of electrical testing.
Now that you’ve got the basics down, let’s move on to the actual testing process.
Step-by-Step Guide to Testing Electrical Wires
Testing electrical wires doesn’t have to be a daunting task. Follow these steps, and you’ll be testing like a pro in no time:
Step 1: Turn Off the Power
Safety first, always. Before you touch any wires, make sure the power is turned off at the breaker box. Trust me, you don’t want to be messing with live wires unless you’re Superman.
Step 2: Use a Voltage Tester
Once the power is off, use a voltage tester to confirm that the circuit is indeed dead. This is a quick and easy way to double-check your safety.
Step 3: Inspect the Wires
Take a close look at the wires for any signs of damage, such as fraying, discoloration, or burn marks. If you spot anything suspicious, it’s probably time to replace those wires.
Step 4: Measure Voltage with a Multimeter
Set your multimeter to the appropriate voltage setting and touch the probes to the wire terminals. This will give you an accurate reading of the voltage in the circuit.
Step 5: Test Continuity
Use a continuity tester to check if there’s a complete path for electricity to flow. If the tester lights up or beeps, you’ve got continuity. If not, there might be a break in the circuit.
By following these steps, you can confidently test electrical wires and identify any potential issues.
Common Mistakes to Avoid
Even the best of us make mistakes, but when it comes to electrical testing, some errors can be costly—or even dangerous. Here are a few common mistakes to avoid:
- Not turning off the power before testing
- Using faulty or outdated tools
- Ignoring warning signs, like sparks or unusual smells
- Skipping the continuity test
Remember, safety should always be your top priority. If you’re ever in doubt, don’t hesitate to call in a professional.
Advanced Techniques for Testing Electrical Wires
Once you’ve mastered the basics, you might want to explore some advanced techniques for testing electrical wires. Here are a few tips to take your skills to the next level:
Using Thermal Imaging
Thermal imaging cameras can help you detect hot spots in your wiring. These areas could indicate overheating or poor connections, which need to be addressed promptly.
Testing Ground Faults
Ground faults occur when electricity takes an unintended path to the ground. Testing for ground faults is essential, especially in areas like bathrooms and kitchens where water is present.
Mapping Your Circuit
Creating a map of your home’s electrical circuit can help you identify potential problem areas and plan future upgrades. It’s like having a treasure map for your wiring.
These advanced techniques can help you tackle more complex electrical issues and ensure your system is running optimally.
Troubleshooting Common Electrical Issues
Even with proper testing, electrical issues can still pop up. Here are some common problems and how to troubleshoot them:
- Flickering Lights: Could indicate a loose connection or faulty wiring. Check the connections and replace any damaged wires.
- Tripping Circuit Breakers: Often caused by overloaded circuits. Try redistributing the load or upgrading your breaker box.
- Dead Outlets: Might be due to a tripped GFCI outlet or a broken connection. Test the outlet and reset any tripped breakers.
By addressing these issues promptly, you can prevent them from escalating into bigger problems.
Safety Tips for Electrical Testing
Safety should always be at the forefront of your mind when working with electricity. Here are a few tips to keep you safe:
- Wear insulated gloves and safety goggles
- Use tools with insulated handles
- Double-check that the power is off before testing
- Never work alone—have someone nearby in case of emergencies
Following these safety tips can help you avoid accidents and ensure a smooth testing process.
When to Call a Professional
While testing electrical wires is a valuable skill, there are times when it’s best to leave the job to the experts. Here are a few scenarios where calling a professional is the smart choice:
- Dealing with complex wiring systems
- Working with high-voltage circuits
- Identifying and repairing serious electrical faults
Don’t be afraid to admit when you’re in over your head. Professionals have the expertise and experience to handle even the most challenging electrical issues.
Conclusion
Alright, we’ve covered a lot of ground here. From understanding the basics of electrical testing to advanced techniques and troubleshooting tips, you’re now equipped with the knowledge to test electrical wires like a pro. Remember, safety is key, and don’t hesitate to call in a professional if you’re unsure.
So, what are you waiting for? Grab your tools and start testing those wires. And don’t forget to share this guide with your friends and family. Who knows? You might just inspire someone else to take on the challenge of electrical testing. Happy testing, folks!
Table of Contents
- Why Testing Electrical Wires Matters
- Tools You’ll Need to Test Electrical Wires
- Understanding the Basics of Electrical Testing
- Step-by-Step Guide to Testing Electrical Wires
- Common Mistakes to Avoid
- Advanced Techniques for Testing Electrical Wires
- Troubleshooting Common Electrical Issues
- Safety Tips for Electrical Testing
- When to Call a Professional
- Conclusion